JavaScript Game Development: Inside 01 Edu's Make-Your-Game Project
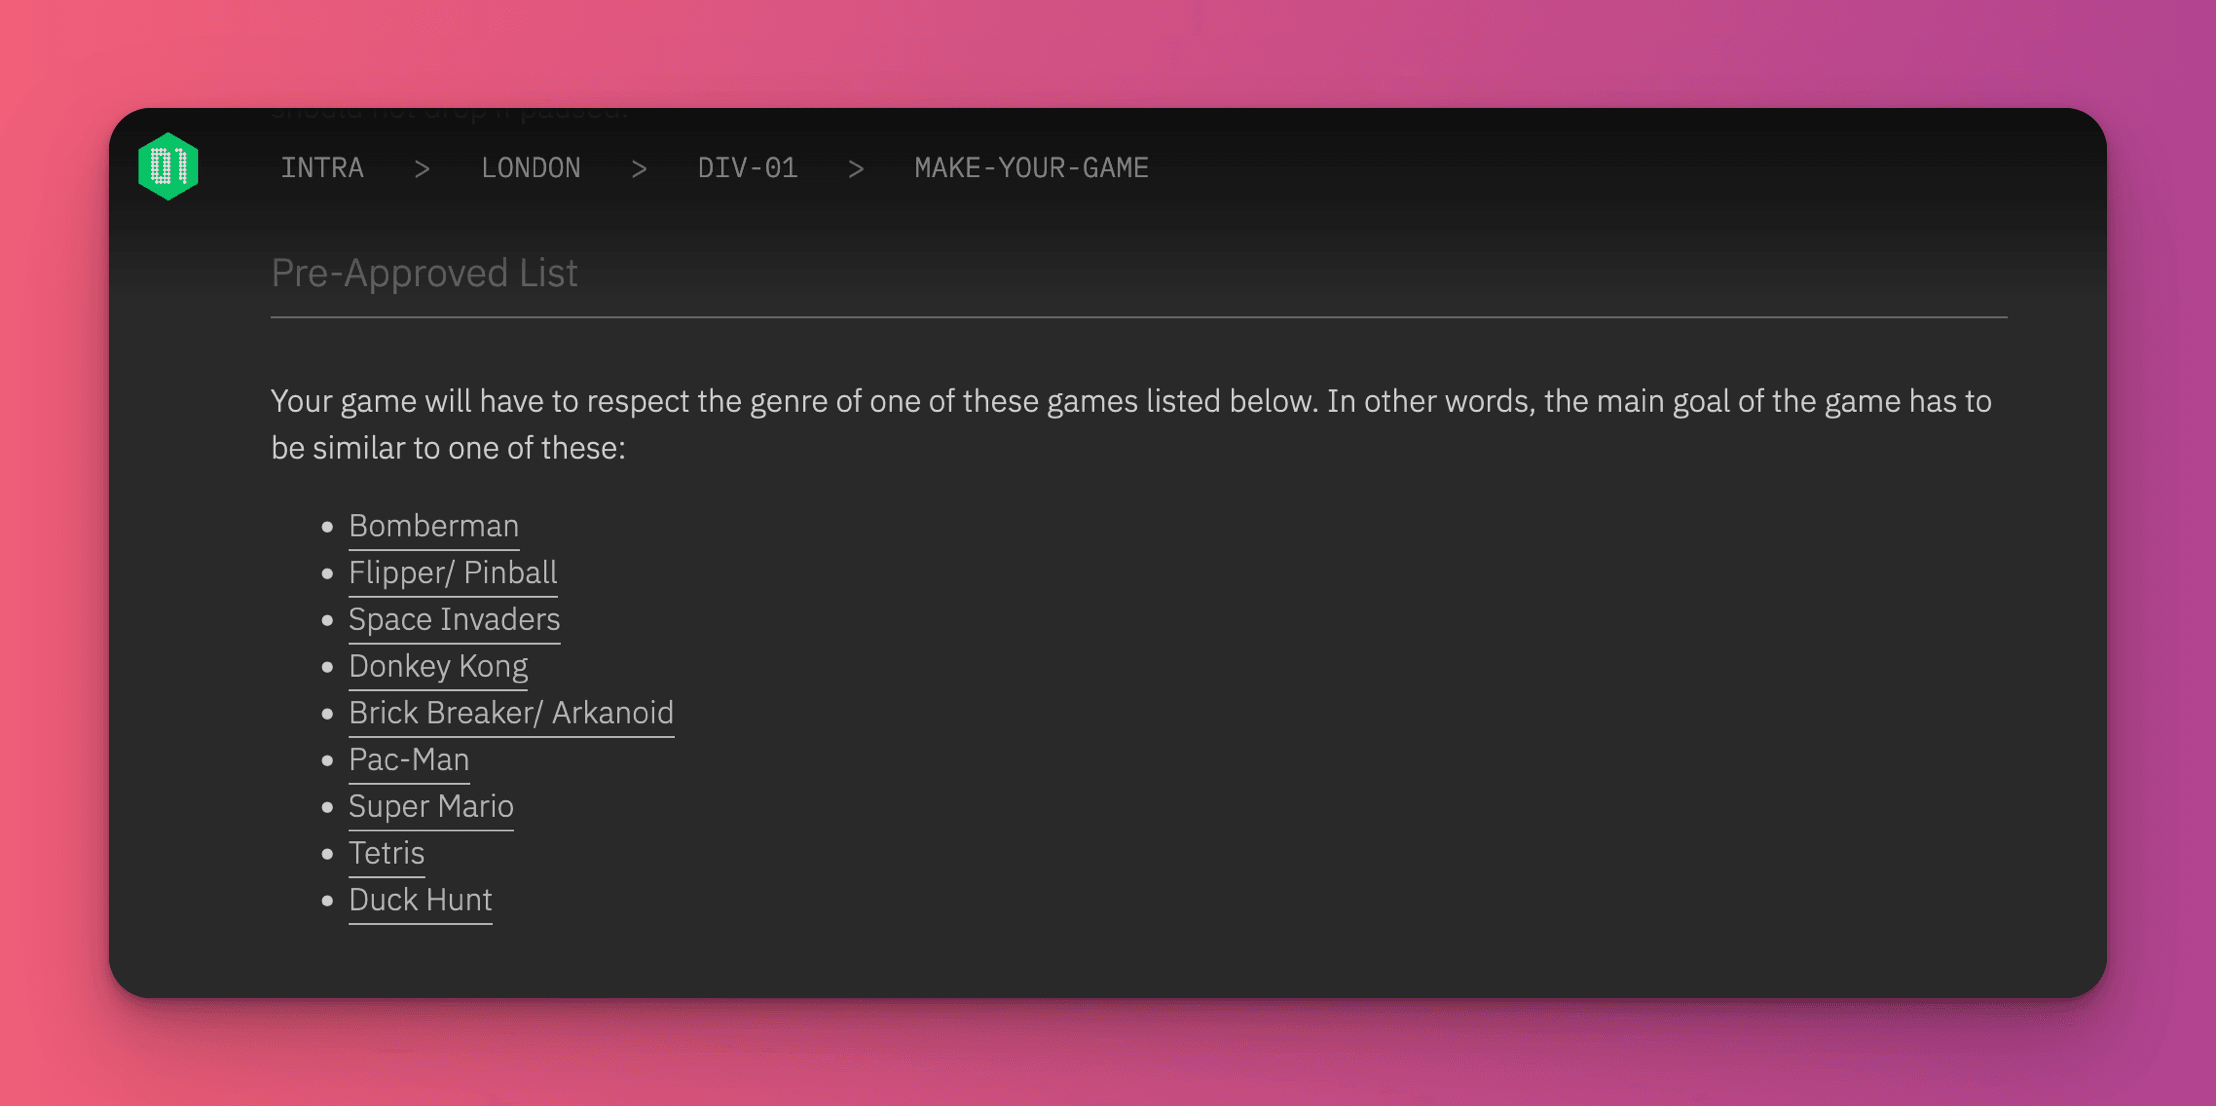
Objectives (opens in a new tab) for this project:
- Game should run at minimum of 60 FPS with no frame drops
- Proper use of RequestAnimationFrame
- Measure performance to ensure efficient code
- Pause menu with options to continue or restart
- Score board with countdown timer, current score, and remaining lives
- Must be implemented using plain JS/DOM and HTML, no frameworks or canvas allowed
.
When I started this task, I had no idea where to begin. I admit that I hadn't thought much about making a game before. I just knew I wanted to create something different. Here is a brief summary of how things unfolded.
If you want to try it out, here you go: Brick Invaders.
After completing the JavaScript Piscine and returning to campus after a family emergency, I asked two students, Jason and Abdul, if they would be interested in collaborating.
They had already tried to build Space Invaders on their own before I joined the group. So, I suggested combining two games, and that's where it all began. We hoped this would be a unique idea that hadn't been done before.

This initial sketch combines an image of the original Breakbreaker game created by Steve Wozniak for Atari with an image of the 👾 from the Invaders game by Tomohiro Nishikado.
Jason and Abdul had a slight head start in creating a game using JavaScript, but I was unsure where to start. We found a video (opens in a new tab) demonstrating how to build a game without using a canvas, which was exactly what we needed. This video gave us a great starting point and showed us that we could shift elements by manipulating the DOM with JavaScript. The DOM, or Document Object Model, represents the structure of a web page. By using JavaScript, we can change elements on the page, making it possible to build interactive games without needing a canvas.
Why Not Use Canvas? Using HTML canvas could have simplified certain aspects of our project, particularly in graphics rendering and animations. The canvas element allows for direct drawing on a 2D surface, making it more efficient for creating and moving game elements. However, our project had specific requirements: we had to use plain JavaScript and the DOM without relying on frameworks or the canvas element. This constraint challenged us to think creatively and find alternative ways to build our game.
While canvas is generally better for high-performance, graphics-intensive tasks, manipulating the DOM can also be effective for simpler animations. For instance, you can easily manipulate an HTML div to create a shape, specify its size, and use CSS to change its position and move it around, as demonstrated below.
Which is what we did to implement the ball movement. The only difference is that instead of moving it once, the movement logic was added to a setInterval function (opens in a new tab) to test it. The setInterval function repeatedly runs the specified code or function at defined time intervals, making it suitable for simple animations like moving a ball across the screen.
Here’s an example of how setInterval is used:
setInterval(expression, timeout);
/*
runs the code/function repeatedly,
with the length of the timeout between each repetition.
*/
By using setInterval, we were able to achieve smooth, continuous movement of the ball without relying on canvas, adhering to the project constraints and demonstrating the versatility of plain JavaScript and DOM manipulation.
Ball Bounce
To animate the ball bouncing within the browser window, we continuously update its position and reverse its direction whenever it hits the walls.

Here's the implementation in JavaScript:
// This is some sample code of how the ball direction was tracked

const ballStart = [300, 50];
let ballCurrentPosition = ballStart;

let xDirection = -2;
let yDirection = 2;

//draw Ball
function drawBall() {
  ball.style.left = ballCurrentPosition[0] + "px";
  ball.style.bottom = ballCurrentPosition[1] + "px";
}

//move ball
function moveBall() {
  // if ball reaches walls (hardcoded values here)
  if (ballCurrentPosition[0] <= 0 || ballCurrentPosition[0] >= 600 - 15) {
    xDirection = -xDirection;
  }
  if (
    ballCurrentPosition[1] <= 0 ||
    ballCurrentPosition[1] >= window.innerHeight - 15
  ) {
    yDirection = -yDirection;
  }
  ballCurrentPosition[0] += xDirection;
  ballCurrentPosition[1] += yDirection;
  drawBall();
}

timerId = setInterval(moveBall, 30);
The length of the timeout is set to 16.67 (60 FPS in milliseconds
is 1000/60)
You should notice that the movement is not smooth.
The FPS counter might show a higher frame rate due to the way the setInterval and Date.now() functions work. The setInterval function's interval is not always exact due to the event loop and other processing tasks in the browser, leading to slight variations in the interval timing.
Transition to requestAnimationFrame
As you can see using setInterval did not allow for a smooth movement of the ball. To improve the animation, we switched to requestAnimationFrame (opens in a new tab), which allows for smoother, more efficient updates by leveraging the browser's painting cycle.
We incorporated this into a game loop, which is a continuous loop that updates the game state and renders the game elements. This loop is essential for creating smooth animations and ensuring that the game runs at a consistent frame rate.
Event Loop vs. Game Loop
Event Loop: The event loop is a fundamental concept in JavaScript and web development. It handles asynchronous operations like callbacks, promises, and events. The event loop continuously checks the call stack to see if any functions need to run and handles tasks in the background, ensuring smooth execution of code without blocking.
Game Loop: The game loop, on the other hand, is specific to game development. It repeatedly updates the game state and renders the game, typically at a target frame rate (e.g., 60 frames per second). The game loop uses requestAnimationFrame to synchronize these updates with the browser's refresh rate, providing smooth and consistent animations.
This video provides a great explanation of how the event loop (opens in a new tab) works and how requestAnimationFrame can be used to create smooth animations.
Here is how it looks like using requestAnimationFrame:
function gameLoop() {
    // Update game state
    moveBall();
    // Render game state
    drawBall();
    // Call the next frame
    requestAnimationFrame(gameLoop);
}

requestAnimationFrame(gameLoop);
The movement should look smoother.
Breaking it down to components
Ball Movement
We began with the ball movement, which was the first component. Therefore we decided to create the remaining components separately so that we could easily put them all together later.
Paddle Movement
We created a new subfolder and began working on the logic for the paddle, which can be controlled with keyboard commands. The challenge was to make the paddle movement smoother. We achieved this by using both the keydown and keyup events. The paddle continues moving in the direction of the keydown event until the key is released.
Bricks
Working on creating the bricks was the next step. We decided to create a function that would generate the bricks and display them on the screen. We also added a function to remove the bricks when they were hit by the ball.
Aliens (Invaders)
We moved on to creating the aliens. I used photoshop to put together a gif of the alien, which we could then use in the game.
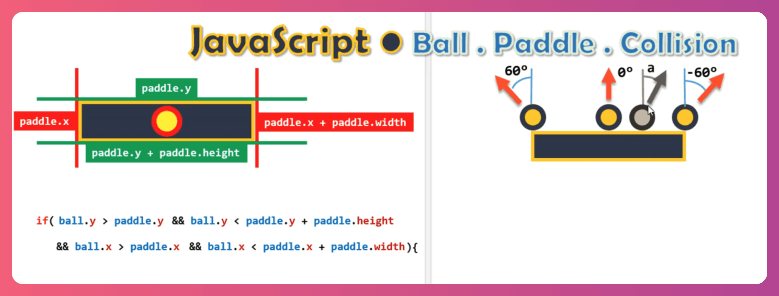
Collision
Next, we had to figure out collision detection. After watching a helpful video (opens in a new tab), we created a function that checks for the Dom Rect (opens in a new tab) and detects collisions.
// DOMRect describes the size and position of a rectangle.

export function checkCollision(ball, objectDOMRect) {
  if (
    ball.x > objectDOMRect.x + objectDOMRect.width ||
    ball.x + ball.width < objectDOMRect.x ||
    ball.y > objectDOMRect.y + objectDOMRect.height ||
    ball.y + ball.height < objectDOMRect.y
  ) {
    // no collision
    return false;
  } else {
    // collision!!
    return true;
  }
}
After working on the paddle bounce, we realized that we wanted the ball to bounce at different angles. We found a helpful video (opens in a new tab) that showed us how to implement this feature.
Refactoring

Surely enough, we had a codebase with many reused variables and hard-coded values.
Continuing this way would make future changes difficult. While some people might prioritize getting the code to work first and cleaning it up later, I prefer to keep things organized as I go. It's satisfying when different functions come together smoothly, like Lego bricks, and work as intended.
After doing some research on some best practices and hoping I made the right choice. I decided to take the leap and refactor the codebase.
Refactoring can be a daunting task, and it's not always clear where to start. We began by organizing the global variables in one place.
After discussing with other students who had completed the project, I decided to take the opportunity to refactor the code and consider using the translate CSS property to move the ball instead of changing its pixel position.
I created a new branch and attempted this change but quickly realized that it would take a significant amount of time to refactor. The logic was very different, and the new changes were causing various components to break. As a result, I decided to revert to the version that was currently working.
The refactoring process included using clear naming styles and consistently applying the same style to the other components to adhere to the DRY (Don't Repeat Yourself) principle (opens in a new tab).
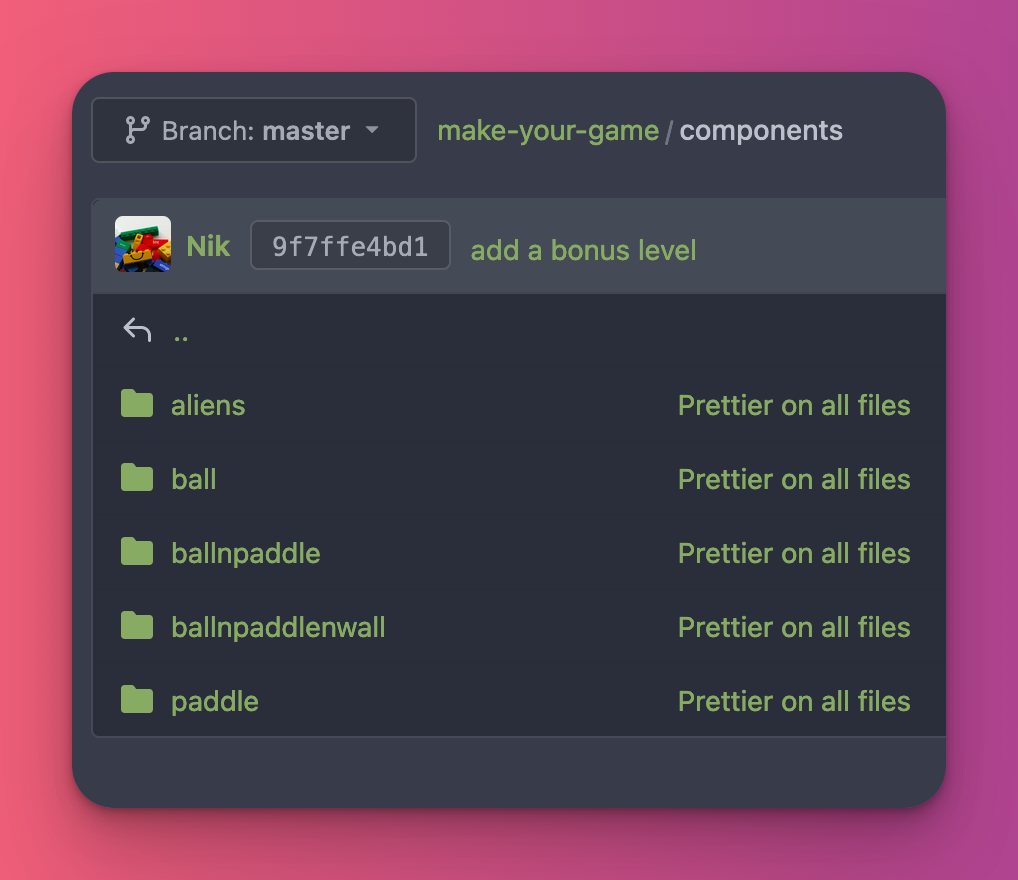
To make the code more organized and efficient, I decided to split the components into separate files, each containing the logic for a specific component. By using the import and export functions, we were able to easily reuse these files in our project, which helped improve the overall structure and maintainability of the code.

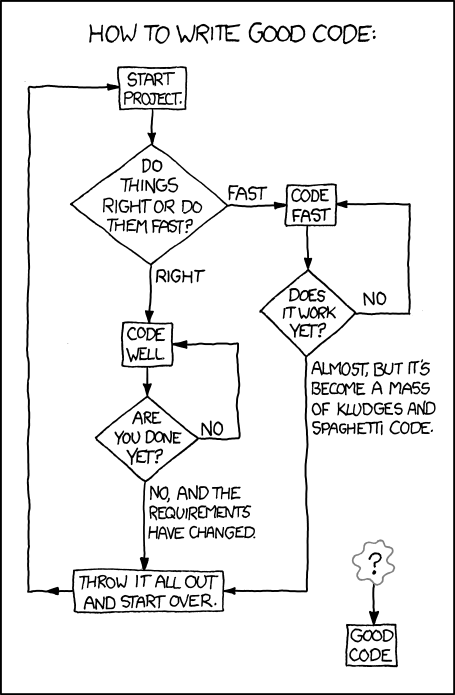
However, it is important to remember that striving for perfect code isn't always necessary. Sometimes, it's more crucial to focus on delivering a functional product and meeting deadlines rather than spending too much time optimizing every part of the code. It's about balancing high-quality code with practicality to meet project goals and deliver value to users.
During our recent visit to the Snyk (opens in a new tab) London office, a developer told us not to get too attached to our code because it might get replaced one day. This really resonated with me. It reminded me that while writing clean and efficient code is important, the ultimate goal is to deliver maintainable code that meets the needs of the project.
Bonus Tip! 😆
Here's a simple way to improve your code: Reduce your "WTFs" per minute by making your code easier to understand.

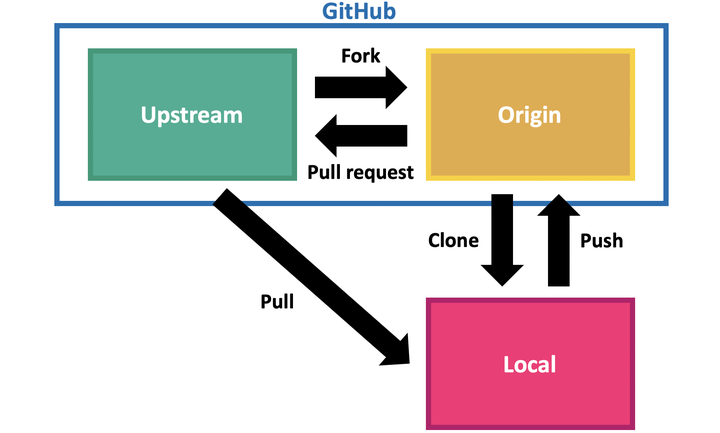
Git Workflow
For our workflow, we decided to use a forked repository and create pull requests for any changes. This allowed everyone on the team to contribute to the project and ensured that all changes were reviewed and approved before being merged into the main repository.
Live Update / thoughts while writing this article
-
Team is doing well. They are constantly improving - they tackle tasks and get them done.
-
We're figuring out the points system:
Event Points Avoid killing aliens and breaking the bricks Higher multiplier Ball hitting an alien Ball hitting a laser Brick to Brick (No paddle) Start combo / multiplier Ball hitting paddle Reset combo / multiplier
Getting the Project Ready for Auditing
We learned that there would be a mass audit for projects, and any group that had completed their project could get it reviewed. This motivated us to increase our productivity. We held several productive remote working sessions using VSCode Live Share and Discord for voice chat, and everyone was eager to get the project ready in time for the audit day.
Fixing Bugs
It was challenging to figure out how to fix various issues, but we eventually found solutions and resolved the problems.
Video of the ball getting stuck between the bricks.
Audio
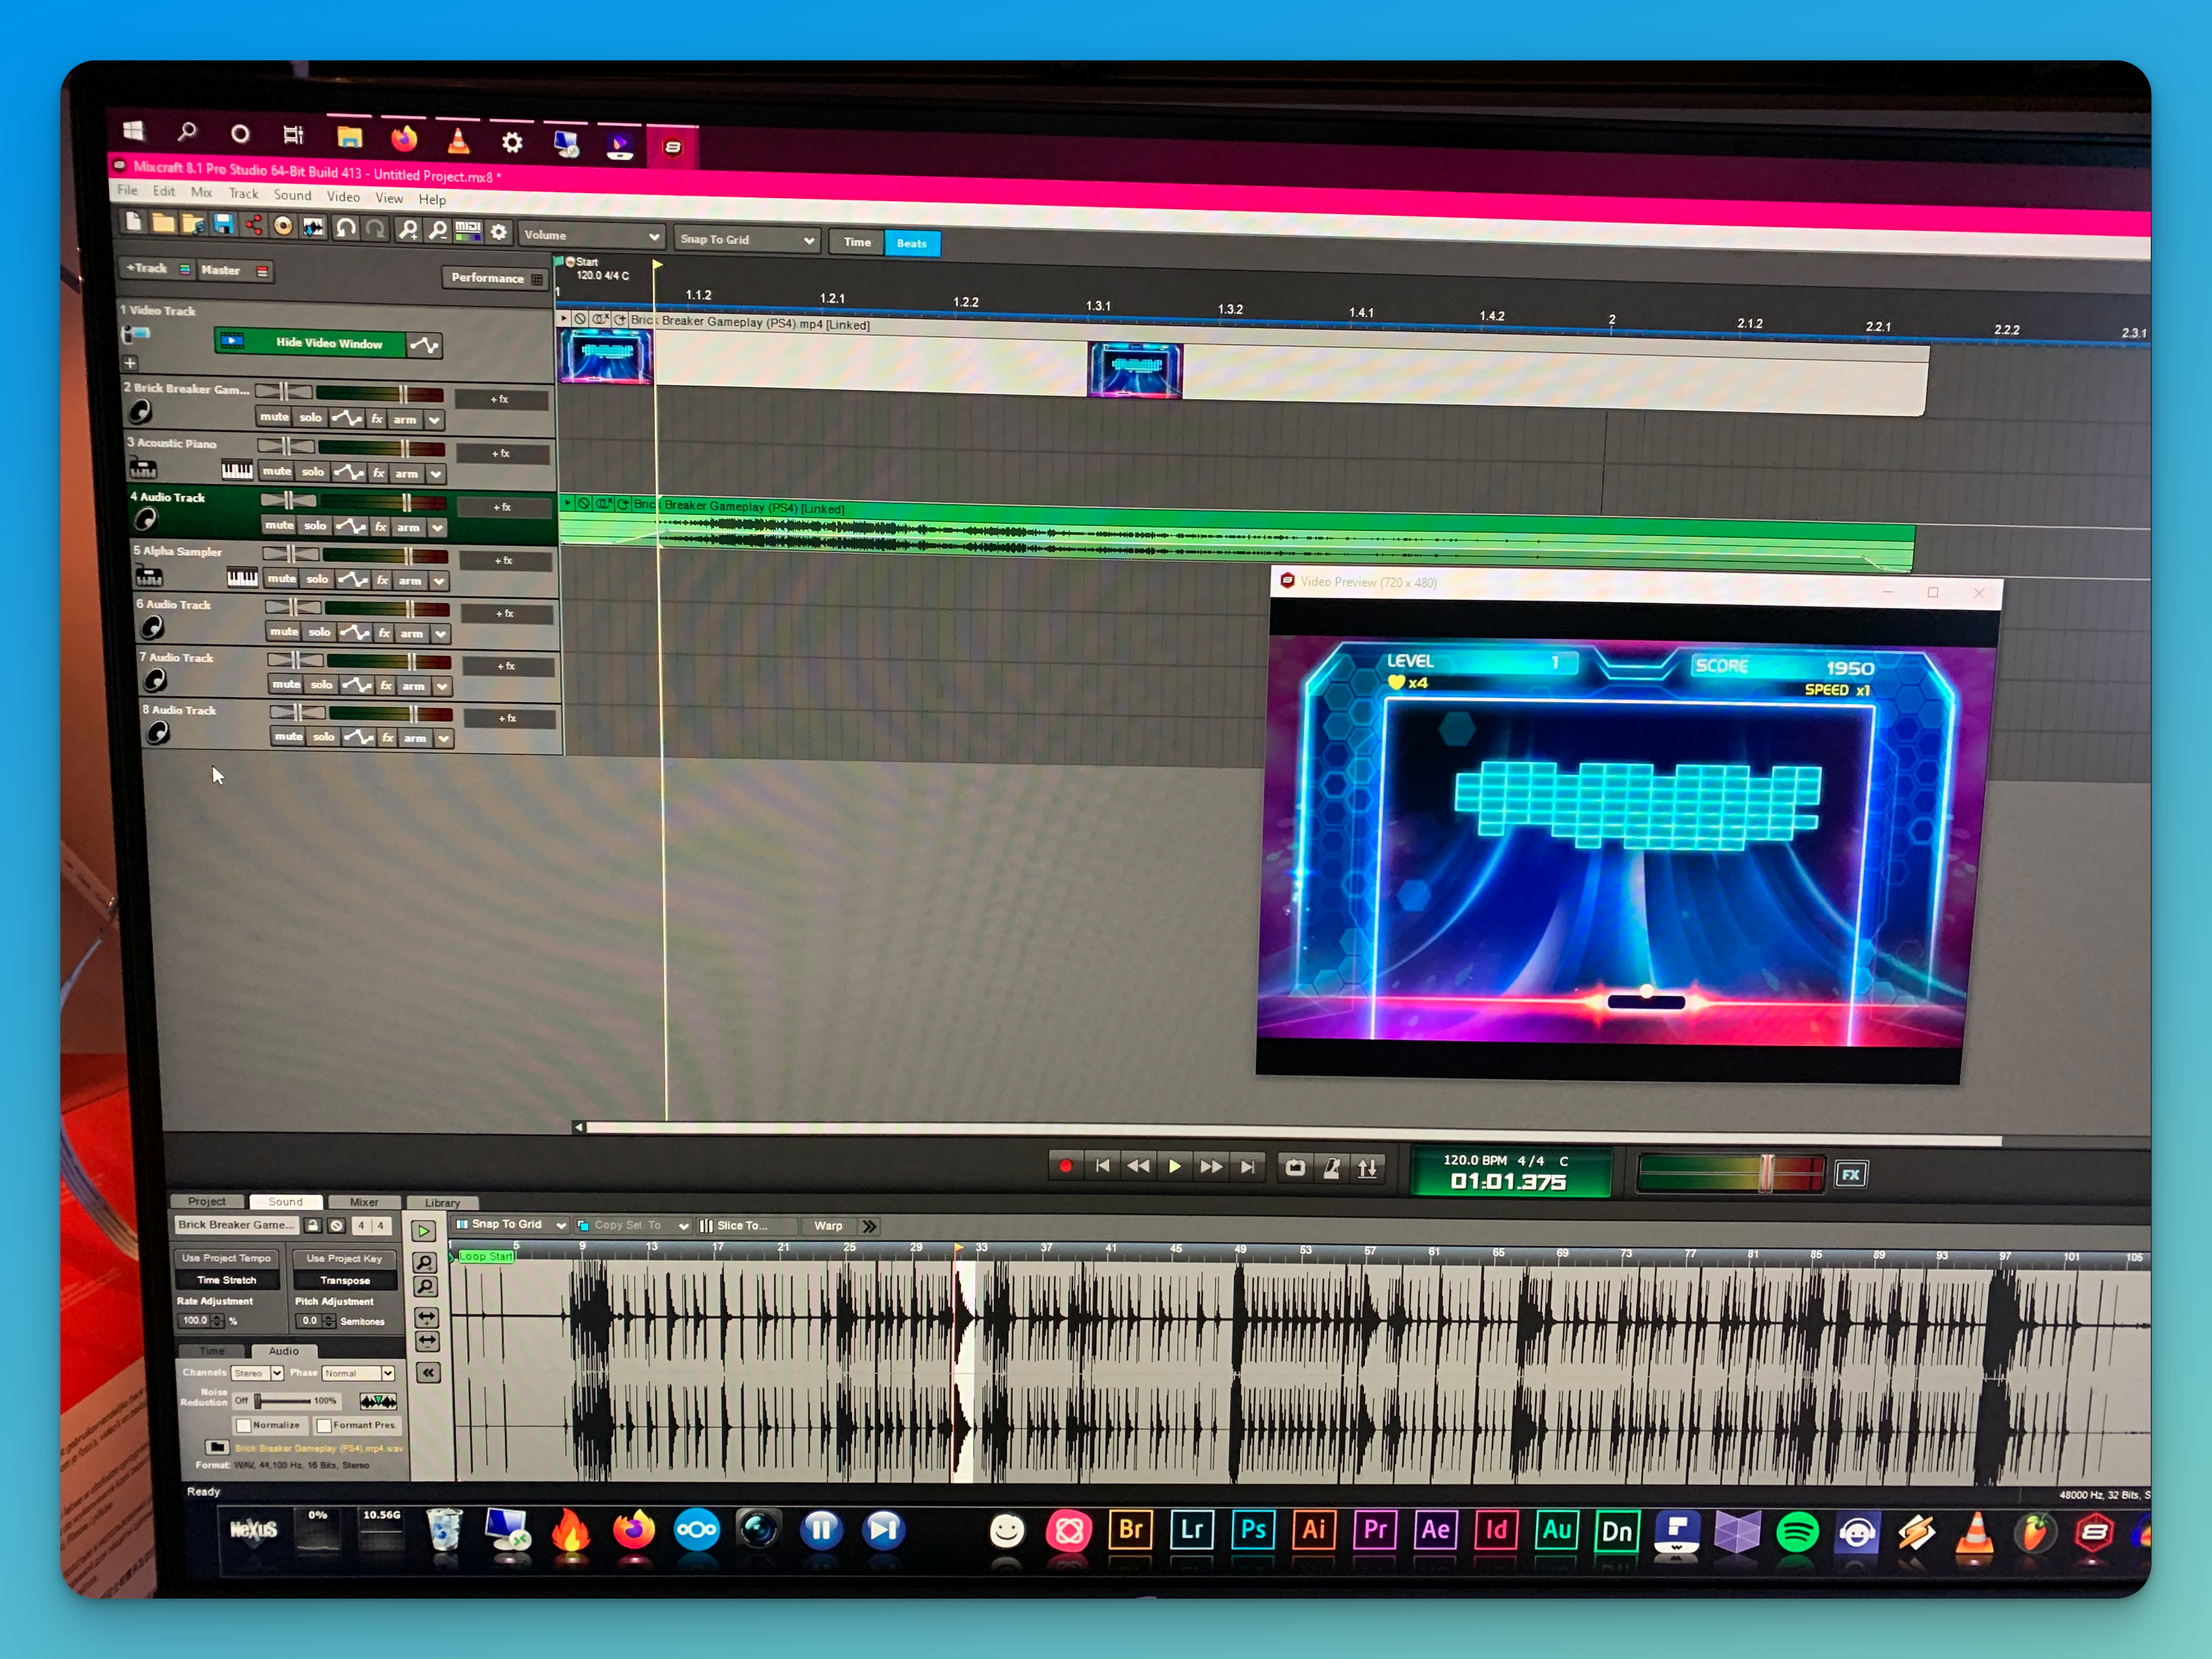
To enhance the gameplay experience, we decided to add some audio effects. We easily clipped and included different sounds to make the game more immersive.
//example
sounds.bouncePaddle.play();
This added another layer of interactivity for players and helped create a more engaging experience overall.
Post Audit

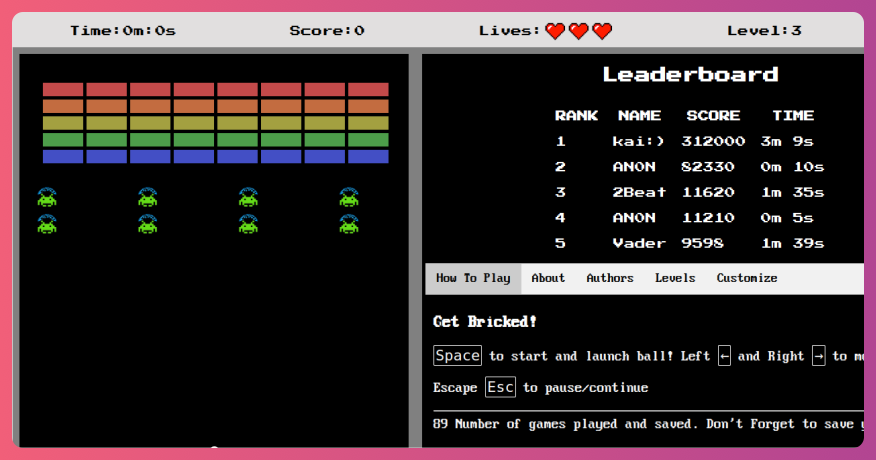
After completing the audit, I wanted to share the project with others so that they could try it out and provide feedback. In the process, I ended up adding a number of additional features, including:
- simple leaderboard
- a profanity checker for the leaderboard names (using an free API)
- ability for users to choose the color of their ball and paddle
- mobile touch control (not fully optimised)
- The option for users to play with multiple balls at the same time, increasing the game's complexity and adding a strategic element.
While these extra features were not initially planned, I felt that they would add value to the project and enhance the user experience.
Things that we should have done
There were a few things that we should have discussed at the beginning of the project that would have made things go more smoothly.
- Having a style guide to ensure consistent formatting and coding practices across the team.
- Using a tool like Prettier, which automatically formats files on save, to save time and ensure all code follows the style guide.
Things we learned
Throughout this project, we learned a number of valuable lessons and skills, including:
- The event loop in JavaScript
- Techniques for creating smooth and fluid animations
- The importance of breaking down logic into reusable components
These lessons will be invaluable in future projects and will help us create more efficient and effective code.
One of the lessons I learned while working on this project was that just because a game is functional does not necessarily mean it will be fun to play. It's important to consider factors such as gameplay mechanics, level design, and user experience to create a truly enjoyable game.
Team work
I want to give a huge shoutout to Jason and Abdul for their invaluable contributions to this project. They consistently took the initiative to ask great questions and come up with **solutions on their own. I was only needed to clean up and finalize their work. Overall, the entire team did an excellent job and contributed to the success of the project.
Vulnerabilities
I thought having a public leaderboard would add excitement and competition for players, allowing them to see how they ranked against others. However, the public leaderboard also introduced vulnerabilities we needed to address.
I anticipated that some players might try to manipulate their scores. As expected, this happened after a few days, with some players using developer tools in their browsers to change game elements. While this is not ideal, it is a common issue in online gaming, and we will need to find ways to prevent or reduce it in the future.
I want to commend the creativity of the players who found ways to manipulate the game. While I wrote some functions to prevent further incidents, I have only been able to stop players from achieving scores higher than the theoretical maximum using these techniques. I believe that implementing a rate limiter, which checks for unusually high combos in a short amount of time, could be effective in preventing score manipulation.
Reflecting on the Development of Our Game
Overall, developing this game was challenging but rewarding. Despite some obstacles, we created a functional and enjoyable game that received positive feedback.
Try it here : https://brickinvaders.nikdon.com/ (opens in a new tab)